


Washing:
Wash every week (take it to a water center when there too much hard mud so that pressure cleaning can be done, ensure he does NOT directly spray on the bike...ask him to use his finger so that spray is not direct the water should flow like a garden spray).
You need:
1. Bucket and shampoo
2. Good towel which is lint free
3. Old tooth brush and paint brush and Kerosene or Diesel
4. Oil or appropriate lubricant
5. Plastic cover
6. Adhesive tapes
7. Chamois leather (optional :))
Shampooing: Don't use Nirma, Wheel, and Surf etc. They will just eat the latex coat (which gives the shine). The best solution is to use a Wax Based Car cleaning shampoo and the economic solution is to use a Shampoo like Sunsilk or Garnier if you prefer :)
1. Always choose a cool and shady place at the same time do not do this at night you might not see able to see the grim properly. Ensure that there is no direct sun light as sun light might leave hard to remove and ugly water stains.
2. Before you start the washing, take an old paint brush. Dip it in Kerosene or Diesel and apply to oil stained area or areas with strong grim such as under the chassis, crankcase etc. Kerosene or Diesel will ease the grim easily.
3. Pour the shampoo in the bucket and fill it if possible with warm water. Warm water removes stains and dust well than cold water.
4. Cover Silencer, Control Cables (handle bar), Spark plus unit with plastic covers to ensure that the water doesn’t get into it.
5. Remove keys and stick adhesive tape so that water doesn’t seep in.
6. Do spot stain checking and apply the washing shampoo to stain spots using toothbrush.
7. Start washing from top to bottom.
8. Wash her once and check for spots. If needed do it again.
9. Now spray plain water all over the bile again bottom to top.
10. Ensure that there no soap left.
11. Shake your bike or move it front and back to shake of excess water.
12. Now put her on side stand and let her idle for 5 mins and remove the plastic covers.
13. Now wipe her dry using Chamois leather.
14. Lubricate all joints.
Now your bull is spotless and clean :-)

• Always wet and wring chamois leather before drying your bike. It will absurd more water than a dry one.
• Before starting the bike, close the fuel tap and open the over flow nut in the Carb. Let all the petrol run away. Now tighten it. Again do the same. This will remove any water that is present in the carb.
Paint Polishes:
This is an interesting subject. Basically there are two types of polishes, Synthetic and Organic. Any polymer-based polish is an example of Synthetic type whereas any wax-based polish is an example of organic wax.
Synthetic:
The biggest benefit of synthetic polish is the LIFE of the polish. Some polishes available in the US even work for 5 years if applied properly. The problem with Synthetic polishes is that the lower polymers in the polish bond with the paint surface which prevents expansion or contraction of paints with respect to the climatic condition, which might cause the paint to crack. This will change in time and the latest ones have overcome this problem.
Organic:
Since these are organic they bond really well with the paint and do not affect the expansion or the contraction of the paint thereby preventing cracking. They also tend to give a better shine and richness than a synthetic polish. The only problem with them is LIFE and being oil based it attracts more dust than synthetic ones which have almost no oil. You might have to apply every month or week based on your climatic conditions. My personal choice is to go for any Polish that has Carnauba wax. Eg: Formula 1 car wax or Carnauba Straight. Also, wax paste is better than liquid wax.
If you live near very dusty environment, then the best one is Synthetic polishes.
Zaino is the best.
Applying Polish:
Now get a good wax polish (refer below). Apply it evenly in circular motion or as specified, some manufacturers prefer vertical straight motion. Leave it for a min and you will see the haze now (varies with polishes). Puff it in circular motion or as specified. Now the paint is shining and you can see your smile reflected :)
Test:
Drop a drop of water. If it stays you need wax more, if it ran down without a trace, give yourself a pat.
Rainy days:
Rust is the best villain. Good polish like Zaino should protect your bull for 2 weeks and Carnauba based ones will protect you for 1 week. During this time they will have water repellant effect and will gradually weaken. So polish your BULL frequently.
Economic solution (metal and chrome) Try this:
Buy a Flint or Baygon Spray sprayer. Mix 1 part of Kerosene to 2 parts of Coconut oil. Now spray it all over the bike using the sprayer. Give 30 mins and wipe clean. This will prevent your bike from rust. The only sore point, OIL ATTRACTS DUST and GRIME. So be ready to wipe her everyday.
Now if you do the above mentioned every week and wipe once a day, your BULL will be ageless like a Mona Lisa :->=
Polishes:
Imported (Ranking in order):
1. Zaino Z2 with Z1 (This was voted the best and can last for 4 weeks)
2. Einszentt Glanz Wax
3. Eagle One’s NanoWax
Source: Guru Report’s Ultimate Wax test -
http://forums.roadfly.org/forums/detailing/5256389-1.html
www.gurureports.com
Others:
1. Formula 1 (Cheap and good Carnauba wax polish)
2. Arexons Wax
3. Turtle Wax
4. Armour all
5. STP
6. Mother’s Wax
7. Waxpol
8. Wax it
9. Carnauba Straight
Tidbits:
The History of Carnauba Wax
Carnauba wax is a resin produced by the wax palm tree Copernicia Cerifera. This tree grows in various parts of South America. However, only the trees in the Northeastern tropical rain forests of Brazil produce the premium quality wax used by MOTHERS®.

Carnauba has a very strong grain structure and is the hardest wax known to man. In addition to being incredibly durable, carnauba dries to a deep, natural shine (in contrast, bees wax, paraffin and many synthetic waxes tend to cloud and occlude). Carnauba wax is produced by the leaves of the tropical carnauba tree as protection from the incredibly harsh conditions of the tropical rain forest — intense heat, harsh equatorial sun and constant moisture and humidity. Any surface coated with carnauba wax will be similarly protected. Aside from automotive appearance products carnauba wax is used as a finish coating on a wide variety of items including: fine furniture, tobacco pipes and produce (apples, pears, etc. are sprayed with carnauba to achieve their polished look). It’s a major ingredient in lipstick and other cosmetics. Before the advent of vinyl it was used extensively in producing phonograph records. Carnauba wax is so pure it’s routinely used to coat pills in the pharmaceutical industry.
Source: Mother’s wax polishes www.mothers.com
Chrome Polishing:
What is Chrome plating?
Not going into technical analysis, chrome plating is nothing but coating a component or part of you BULL with a mixture of metals, primarily Chromium and Nickel. Chrome plating gives great luster and mirror like to finish. Some example of Chrome plated parts in your BULL are Handle Bar, Silencer, Crash Guard, Saree Guard and so on.
Note: The crankcase is Buffed Aluminum and not Chrome. Check out the Aluminum section.
Applying Polishes:
General rule for any polish applies, first try in a small spot. If satisfied go ahead.
1. Apply the polish to the chromed region in circular mode or as instructed by the manufacturer.
2. Leave it for a min to form a haze (again check instructions).
3. Now wipe it clean and buff it with a clean turkey towel or any cotton cloth which is lint free.
4. Apply some wax.
Do the water test. The chrome parts will be as good as a Mirror.
Polishes:
1. ICI Silicon Polish (Rating: 3/5)
2. Zinc Chloride or Chalk Powder (2/5)
3. Mr.Metal (4/5)
4. Eagle One’s Mag, Chrome and Aluminium Polish (yet to be tested)
Alluminum:
Polished Aluminum's life (life of the gloss not the metal) is less as it tarnishes because of oxidation. It becomes dull very fast and water based stains if not wiped immediately will stay for long.
This is what I am doing currently. I am using "Autosol" polish for Aluminum (It’s available in hardware shops).
1. Apply it on the aluminum part and rub in circular motion. You will see the cloth turning black (will explain this later).
2. Once it's really black, change it and use a clean cloth and buff it as much as you can. There are two schools of thought one which says leave the polish for 1-2 mins before polishing and the other which says don't leave any gap. I prefer the second school. Will try the first school and update later.
3. Leave it to dry and apply some wax.
1. Polishing Aluminum is little different. The skill here is the speed and not PRESSURE. That’s why they use high speed buffing wheels. SO the faster you polish the SHINNER she gets.
2. I told about those BLOODY waster spots. There is a solution. Mix 1 portion of vinegar to 1 portion of water. Apply this mixture to then spots and leave them for a min. Now wipe it. Recent spots will vanish. Repeat this process again and again till the OLD spots disappear. This will not cause any harm for aluminum.
Polishes:
1. Eagle One’s Mag and Aluminum Polish ( www.eagleone.com )
2. Mr.Metal ( www.mrmetal.com )
3. Autosol
RUST:
What the bl*** hell is this Rust?
When iron combines with oxygen, it forms iron oxide, or rust. Iron oxide is a larger molecule than iron, so if iron oxidizes; it often puffs up and may even flake. This is because the rust requires more physical space than the original iron. Once rust is formed, there is mobile oxygen in the metal, and the oxygen can move deeper into the metal causing further rust.
Removing RUST:
I am going to give you various ways rust can be removed. If the rust is quite old or if it has marked its territory deep, then the best thing to do will be to chrome plate it again so that it doesn’t eat the steel.
1. Aluminum Foil:
Well you never thought of this right. Try this. Take Aluminum Foil and wrap it
around your finger and rub it until the rust disappears. Ensure that the shiny
side rubs the rust. Works on basic to medium rust.
2. Zinc Chloride or Chalk Powder:
Soft rust can be removed by applying zinc chloride or chalk powder. Wet a piece of cloth and dab some powder and apply on the rusted area. Rub it until the rust is removed.
3. TEA :)
This again works for soft to medium rust. Prepare real think strong tea. Let’s say you should use 5 tea bags for 300 ml of water. Ensure it brews enough and that’s the crucial part. Now let it cool for 5-10 mins. Now soak the rusted part in the Tea for 2-4 hours or until the rust disappears. Wipe it, dry it and apply polish to it. Voila is sparkling.
Okay how does this work…see basically Tea contains tannic acid which attacks the rust.
4. Rubbing Compound:
This is used widely but I am little worried because if not properly used it can eat the metal. Go to any paint store and buy some rubbing compound. The rubbing compound is an abrasive which basically eats RUST and sometime the metal also. Dab some compound on a cloth and rub it in the rusted part till the rust disappears. Now wash the area with mild shampoo and dry it. Apply some petroleum jelly and wipe it clean after one hour. This neutralizes any residue of the compound. Now polish it. Well keep watching this page I will give detailed study on Rubbing Compounds.
Some Rust Removers:
WD40 - Rust Remover / Multipurpose Lubricant (I don’t remember his name but
someone brought this topic in our Bull Meeting last Saturday)
Rustlick 631 DEF11 – from ITW signode India LTD
Preventing Rust:
Option 1: Apply a mixture of 1:2 Coconut Oil: Kerosene using a spray gun or Sprayer.
Option 2: Apply petroleum jelly.
Option 3: Mix 1 part of Anhydrous Lanolin (Any pharmacy or chemical shop) with 5 parts of Paint Thinner. Apply this mixture using a brush. This will form a preventive coat.
Caution: Some might be allergic to Anhydrous Lanolin
Wheel Detailing:
Usually we do not give much attention to this part which is as important as the bike’s engine. I can push my bike without an engine but can I without wheels :- ). So now sit up and concentrate because a little attention on your wheels can make your bike look lot younger 100 times SEXIER. Keeping the wheels in top shape can bring a mediocre bull to Top shape. Now let’s cut to the cheese.
For cleaning purpose, wheel is divided into three parts: tyres, rims and spokes.
Now let’s look into each of them.
Tyres:
How important is the look of the tyre? Well you might wear the Giorgio Armani suit, a designer watch, imported shoes, the best fragrance and then if you have unkept hair which is shabby and colored in all possible ways with dirt and grease how will it look? That’s exactly how your bull will look if the tyres are not treated with respect. Also, just like how a well kept hair prevents Balding a well kept Tyre prevents cracking and improves the life of the tyre.
Of all parts, tyres are subjected to worst treatment. Heat changes due to continuous riding and stopping, bruising from the well laid Indian Roads, scuffing and so on. So please help them and keep them smiling. Here is how to do it :-)=.

Cleaning a Tyre:
1. First inspect for small glass pieces, stones, gravels etc and remove them. These little things impact the life of the threads.
2. Now take soft brush or sponge and wash the tyre with water.
3. Now using a mild soap solution (car wash solutions or mild shampoos) wash the tyre.
4. Dry them suing a soft lint free cloth.
Note:
Never wash the tyres immediately after a ride. Give it a rest of 1 hour before washing. This will cool the tyre and make it ready for you.
Tyre Polishing:
Polishing not only improves the look but also the life of the tyres.
1. Select a non-silicone and non-formaldehyde tyre polish. Formaldehyde might cause harm in due course by separating the body ply from the side walls of the tyres.
2. Apply the tyre polish evenly in circular motion and leave for 1 min (or as instructed by manufacturer).
3. Wipe the tyre and wait for 2 mins.
4. Now shine it for a rich and great luster.
rims:
Rims are mostly chrome plated. Refer to the section on chrome to know about polishing as I will concentrate on just cleaning.

2. Now take some mild soap solution (For me diluted Prill works well). Using the toothbrush apply them in the joints and also on the rim surface and sides of the rims. You can also use a small sponge for this. Leave it for a minute.
3. Now rinse them with clean water.
4. Now apply chrome polish as described in the article.
Spokes:
They can make your bull exotic or crap, there is no two ways about it. With proper care they will shine for long time. The OEM spokes for RE is not chrome plated and do not have a mirror finish. They are made of Mild Steel and have mild shine. The Hub is made of Aluminium and not buffed to shine. Oil and grime are frequent visitors to our spokes and hubs. If left unattended, they will encroach space and settle there as Permanent guest which is not GOOD. Let’s see how to take care of them.
1. Based on the grime or how bad your spokes are, decide on what you need to
use. If it’s really bad then use Fine Scotch Brite. If not then use Sponge.
2. Kerosene is a very good grime remover. Use the Scotch Brite/Sponge and
apply kerosene on the spokes and rub till the grime is removed.
3. Now clean the HUB using a toothbrush and some kerosene.
4. Now take some mild soap solution (for me diluted Prill works well). Using a rinsed scotch Brite/sponge wash the spokes till it’s clean.

5. Wipe it clean with lint free towel.
6. You can apply all purpose metal polish or chalk powder. Refer to the polishing section for more details.
7. Buff them clean for a good shine and big smile on your face.
 Tip: You can polish the Hub using a Metal Polish such as Mr.Metal, Autosol, Mother’s or Eagle’s Aluminium Polish. Refer to the polishing section for more details. Since they are powder coated will take a long time.
Removing Stickers:
1. First you need to kill the properties of the sticker. The best way to do this is, use a Hair Dryer and blow the sticker for 5 mins at varying speed. This will heat the stickers and loose its properties. Alternative is to apply warm water, not HOT water, and let is soak for 3-4 mins.
2. As you apply heat slowly pull the sticker off at 90 degree angle. Almost every sticker comes off this way.
3. If you still have pieces one. Apply an alcohol based solution or paint thinner (Do not use it if the surface is painted) or Nail Polish remover. Some believe even Pepsi or Coke can help due to Acetone in it. Now gently rub it with you fingers.
4. Wash the area with mild shampoo and dry it.
5. If the sticker is still present, use kerosene and wipe it away.
6. Now apply was polish in the surface and buff it.
This is how I removed the bloody KUN HYUNDAI sticker from my Santro :). Also,
you can take it to any sticker shop and ask them to remove it.
General Tips:
1. Bird Droppings: Use warm water instead of cold water, warm water (NOT HOT WATER) will ease the process. First wet the bird dropping and leave for 2 mins then add little shampoo and gently rub wipe with a soft cloth.
2. Do not use SPONGE to wash your BULL. Sponge by default is coarse and small mud particles tend to collect in the small pores. This will result in minute scratches which over the year will dull the paint. Use soft cloth and keep rinsing it.
3. For drying the best is Chamois leather. If it ain’t available, use Terry-cloth towels.
4. The best indicator to determine if your bike needs waxing is WATER. Drop little water on the petrol tank. If it runs away without leaving a trail then your bike is perfect. If stays as drop or leaves trial, its time to WAX her. This is a real good test during rainy days to determine if you bull needs a wax coat.
5. Ouch there is a deep scratch. Apply Petroleum Jelly. It will keep the rust at bay till you paint it.
6. Removing Stiff OIL grime: The best solution is Kerosene/Diesel (I prefer diesel as it doesn’t leave a trail). Take a brush and apply kerosene. It will loosen the grime. Now wash the area will your shampoo. It’s as clean as a white horse.
7. Shampoos will leave strain if left for long. The best will to wash your bike is clean one side of the bike and rinse it, then move to the second side. This will you can eliminate the soap from drying.
Going on Vacation?
If you are going on a long vacation (10 days or more), do the following:
1. Clean you bike completely.
2. Apply polish to the painted area, BUT DO NOT BUFF OR CLEAN, leave it like that. This will form a good protection.
3. Apply automotive wax or furniture wax to chrome and aluminum areas.
4. Apply petroleum jelly to electrical points.
5. Inflate tyres and apply Tyre polish or Kiwi Wax Shoe Polish (Not liquid ones)
Note:
These are only for the external maintenance such as Paints, chrome and
aluminum not for the BULL as such.
FAQs:
(Various question raised by Bulls…not in any order)
1. Brasso: the shopkeeper says its only for brass and not for aluminum.
True. Do not use BRASSO.
2. Silvo/silverso: its for the chrome plated parts ,but can i use it on painted surface,like the tank?
Silvo/silverso: Only for Chrome. NOT for Paint...PLS dont even touch paint with this/ Alternate for chrome and aluminium - Fine chalk powder.
3. waxpol: what is this for? how is it?
waxpol: Wax polish for paint Indian made, Grade - Okay. try Formula 1 or Armour wax its really good.
4. powder wax: does it damage colour?
Pls dont use....use liquid or paste wax
5. today i bought a aluminum-oxide paper which is the size of a A4 sheet but costs 75Rs! the shopkeeper said that it wud remove SCRATCHES! its from a german company called "Wurth" and he claims that it is used by Mercedes car owners to remove scratches. thought , my bull too deserves such a thing and bought it. didnt use it yet. Have u heard of such a paper...its called 1200 paper,they also have 1000,2000 papers.think,the number is some quality number.
This is really long one but will try to cut it short: Have you heard of Sand
paper...I am sure you have...now this Alm oxide is one of the family. What you
have bought is a REAL fine sand paper coated with Alm Oxide which is used for
finishing metal parts like crankcase. the number 1000 signifies how fine your
sandpaper is. 1000 is Super Fine. This is needs to used carefully by exp people
else will result in fine scratches and uneven finish.
credit- madbull ram (madras bulls)

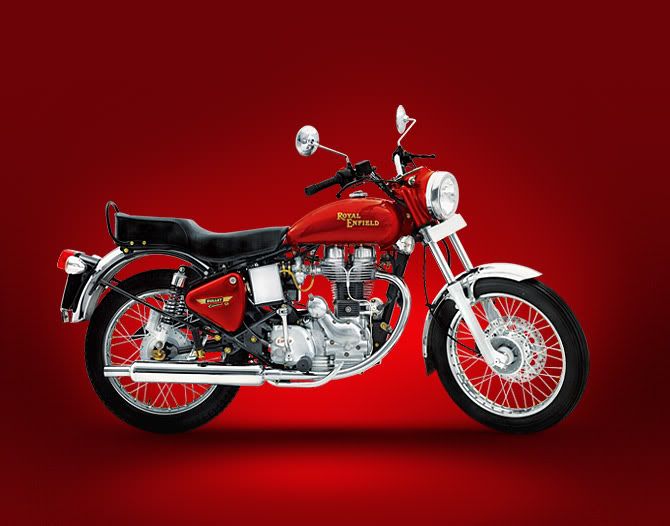
Cleaning your Royal Enfield
An exhaustive article about cleaning and maintaining your royal enfield !!


EFI Made Easy
Everything you need to know to take care of the system on your new EFI Royal Enfield in one short article.
nice article dude...
i use carnauba wax for my bike.. and its a beauty man...
no doubts about it...
Posted on 11:52:00 PM
i certainly wud be considering ur methods...
Posted on 12:42:00 AM
great article on cleaning/ maintaining royal enfield.. thanx alot !!!
Posted on 12:33:00 AM
:) :) :)
nice info man.
Posted on 12:40:00 PM
best article on maintenance/ cleaning royal enfield or for any other bike for that matter...... i hv ever read !!!
Posted on 9:17:00 AM
Very informative ... I am going to try it all on my bull this weekend :)
Could you also suggest a place where I can find all types of polishes you mentioned?
My bull was painted black 2 months ago and i can see stain at the petrol tank .. Around the petrol tank's cap area .. Mechanic says it's due to petrol :( and nothing can be done !!
Is there a way to get rid of it ?
Posted on 12:25:00 PM
Awesome dude! You've taken a lot of time out to write this wonderfully compiled article. Thanks!
Posted on 9:30:00 PM
greatly explained...thanks
Posted on 10:11:00 AM
Wonderful compilation. Really helps. Thanks for your effort. Subbu
Posted on 7:29:00 PM
Wonderful R&D Dude..Thanks a Ton, Will surely be trying it on my Ride...
Posted on 7:59:00 PM
This is one neat list.
Posted on 6:40:00 PM
teflon is not required but you should get anti-rust. also if you are keeping the bike for a long time then get extended warranty.
Posted on 6:45:00 PM
Whoever wrote this article......Many THANKS!!!
Keep up.
It was of great help.
Posted on 1:29:00 AM
great article .. thankz a lot
Posted on 2:38:00 PM
jewelers rouge (A very fine powder of ferric oxide) is the best material to polish Aluminum body. You can get it at jewelers hardware shops. Just clean and rub the surface with 1000 No. water paper (3M company) with diesel or kerosine. Finally polish with 1200 No.water paper. Take little quantity of jewelers rouge with water and rub that paste on Aluminum body. Polish with woolen cloth till you get mirror surface. Feel free to exchange your ideas (suash19@gmail.com)
Posted on 8:07:00 PM
At what portions sould be wax applied?? Could it be used to parts undergoing high temperatures.
Posted on 4:34:00 AM
@ ashvary wax should ideally be applied on the paint portions of your bullet !! You may apply on the chrome areas too but applying on to high temp. parts is a strict no no !!!
Posted on 1:15:00 PM
Great article....Thanks for your time....Great
Posted on 12:52:00 PM
You are a Doctor of Bullet!!!
Thank you for sharing your wisdom!!
Posted on 11:38:00 AM
The first article I've read after getting my classic 500 delivered. Very informative and helpful. Thank you for writing this.
Posted on 8:29:00 AM
Very good article for RE LOVER'S
Posted on 10:21:00 PM
it is very use full to me and my bullet
Posted on 3:48:00 PM
speechless.........!!
Posted on 6:11:00 AM
How much does Autosol cost? Also, can it be used for Chrome parts as well?
Posted on 3:30:00 PM
Threre is rust inside my bullet oil tank. how to remove it ??
Posted on 3:45:00 PM
Nice..Suggestions helped me to clean my bike...:)thkz
Posted on 7:14:00 PM
Very good artical in bike Mainatainance Point of View.
Mohan Bhalsing
Posted on 11:47:00 AM
Today morning I left my bike in hot sun for an hour and later I kept a book with laminated cover on it.what I observed later is the book lost its lamination on my tank and there is a glazy mark over my tank. How can I get rid of this
Posted on 3:26:00 PM
Thank u for this concern. It helped me a lot...
Posted on 8:49:00 AM
Post a Comment