


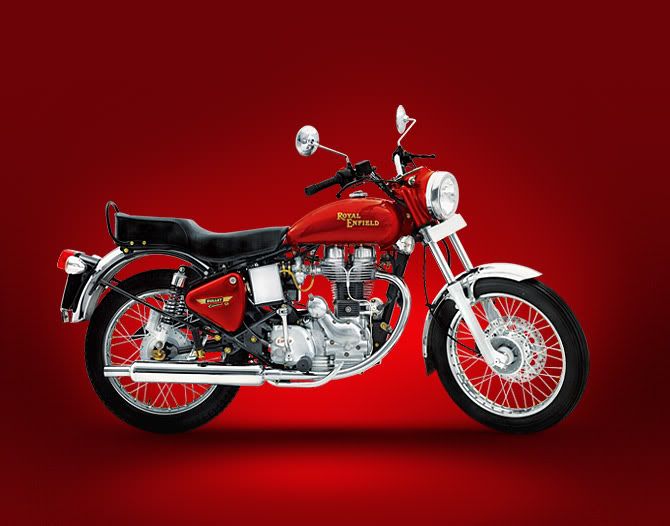


The Royal Enfield Bullet : Replacement of an OEM muffler with aftermarket Exhaust / Carb Rejet
Thursday, January 20, 2011
This page details the replacement of an OEM muffler with an aftermarket muffler and explains the required carburetor rejetting to set the air/fuel mixture appropriately to the new air flow through the engine.
Overview
It is no secret that the modern Bullet exported to western countries is fitted with various details designed to meet noise and emissions standards. In the case of UK machines, this can also involve an air injection (PAV system) into the exhaust and a much modified airbox unit where the filter itself is in the right side toolbox. In the US we have it a bit better as the air filter assembly is in its traditional location freeing up the toolbox. All countries suffer from lean jetting and a silencer that robs many precious horsepower in the name of emissions and sound standards. For all exported Bullets, it is quite easy to bring the bike to correct 1950's UK standards of performance and detail with a few easily obtained parts and a bit of tuning. The benefit is a better sounding Bullet, with greater performance. The tuning part of this text will deal with the 500cc model but will also work with for the 350 with suitable jet selection.
Exhaust Systems
There are many exhaust systems to choose from. The most common are complete versions of the original early 50’s turned up mufflers and mid 50’s parallel to the ground designs. Both are smaller and perform worlds better then the OEM muffler. Hitchcock’s in the UK and DRS cycle offer a mid 50's style UK made muffler that will work with the OEM header pipe for a reasonable price since the entire exhaust system does not have to be replaced. Since the stock OEM header is shorter then the original design, most exhaust systems do require a replacement header pipe unless stated by the seller or manufacturer -- so keep an eye out for this. Other mufflers are similar in looks to the BSA Goldstar with the turned back header pipe and matching silencer. While on the subject, there are a few versions of the BSA Goldstar muffler. By nature of design these are loud mufflers so some may be very loud and brash and others more heavily baffled or packed to be a bit more silent. I personally have a UK made, mid 50's system. Most of the UK made replacement pipes have a removable metal baffle that allows a bit of exhaust tuning for noise control. Any exhaust upgrade requires a carb rejet as well.

An engine is nothing more then an air pump in simplified form. More air in, more air out, more horsepower! With the exhaust system in place, it is a good idea to replace the stock air cleaner with a free flowing replacement at the same time to make the mandatory rejet easier. The stock air filter element looks like it is made of hospital bandages and really corks up the intake airflow. There are 2 types of air filter replacements available. One type replaces the OEM airbox with a clamp-on cone or pancake filter mounted directly to the rear of the carburetor. Another option is using a modified K&N air filter that mounts into the stock airbox with a single cut of the filter housing. These are available from DRS cycle and keep the classic original looks of the bike intact with the greater performance of the clamp on units. I really like this solution! There are conversion kits available for UK bikes to use the original air filter housing or a clamp-on unit.
Carburetor and JetsThe stock carb is a Micarb VM28 that is a licensed copy of the Mikuni VM28. For the United States this is not a bad carburetor since it is familiar and parts are easy to come by. Most older dirt bikes and ATV/ATC's that many of us learned on used various sizes of this carb. The original Bullet used an Amal monoblock that is currently available for sale as a replacement to the factory carb setup complete with new intake manifold. There are also later versions of the Amal concentric carb that can be bought as well. While the debate of "which is better" is beyond the scope of this text, I will offer that both do a great job of taking care of the mixture duties and offer acceptable (and equal) performance in similar sizes. For most of us, the stock carb is more than adequate and will be the focus of this article.

Various jets for Mikarb. Be sure and order several to allow for your particular bike's needs.
Rejet and ancilliary parts:
Rejet and ancilliary parts:
You'll need a list of parts to do this properly. I recommend buying 3 main jets and 2 pilot jets. The main jets you should order are 117.5, 120, and 125 plus a 27.5 and 30 pilot jets. These jets will cover any jetting need with the standard bolt on modification of exhaust and airfilter. In addition, order the heavy-duty intake manifold rubber from Drs cycle or Hitchcock's. I'm very serious about this! The stock intake manifold rubber does not seal correctly and is prone to leaks; sooner or later is will have to be replaced anyway once the carb gets removed a few times. It will be harder to jet the carb properly and get a nice idle without it plus it is very cheap to buy. Also mandatory is the installation of a fuel filter since you'll have access to the fuel lines once the carb of off the bike and don't forget a few sparkplugs which you'll need to test your rejetted mixture. Once rejetted, the Bullet 500 really likes the NGK BR8ES. Total for these parts should be under $30-$40.

Replacement heavy-duty manifold rubber
Rejet procedure:
Tools needed: Phillips head screwdriver, medium head screwdriver, small head screwdriver, and needle-nose pliers.
Removing the carb is easy and only takes a few minutes. This can be done without removing the gas tank although having the tank off does make re-installation a bit easier. The tank is held on by the larger bolt in the front of the tank. Shut off the gas at the petcock and put a few old rags under the carburetor. Unscrew the clamps at the intake and airbox connections and wiggle the carb out of the rubber manifold boot.

Once the carb is out, unscrew the slide cap and pull the slide assembly out of the carb body. The carb is now separated from the Bullet and free to perform the rejet. It would be a good idea to point the carb drain lines towards an old rag and turn the carb upside down to drain the float bowl of fuel before proceeding. Next, unscrew the 4 phillips screws on the bottom of the carb and remove the float bowl cover. The main jet is the larger jet in the middle and the pilot jet is sunk down into a casting in the float bowl. Remove both jets and carefully install the new ones. The main jet has a washer/spacer that should be reused with the new main jet. Jet recommendations and tuning are covered in the next section. It is also a good idea to get acquainted with the slide and needle assembly. Take the slide in your hand, pull the slide spring out of the slide body and remove the drop in throttle cable retainer. A little shake while tilting the slide upside down or using the needle nose pliers will take it out. From here, you can remove the throttle cable from the slide by pushing the cable down while bringing the end of the cable through the center hole. Remove the 2 phillips screws to remove the throttle cable housing and underneath is the needle. Pull the needle out and examine what position the clip is in. It is probably in the second from the bottom clip or one position up or down from there. I would leave it where it is for now but take note of the needle position for future reference (you may be adjusting the clip position later). Put the entire assembly back together. Take note of the large idle screw and the smaller idle mixture screws on the left side of the carb body. You'll be adjusting these later too.

Carb Basics
The main jet by itself is responsible for full throttle operation and along with the needle measures the gas flow at partial throttle operation. The needle blocks portions of the main jet at positions lower than full throttle in order to limit gas flow. The taper and length of the needle is responsible for pinpoint mixture settings at throttle settings above idle to full throttle. It is crucial to fit the proper main jet first and then tune the needle position in order to tune the partial throttle properly.
Lowering the needle by raising its clip leans the mixture; raising the needle by lowering its clip richens the mixture.
The pilot or idle circuit does overlap into partial throttle so take this into consideration when tuning. The idea is to choose a main jet that is neither too rich nor too lean at full throttle operation and tune the cruising mixture through careful needle clip position. Use the plug chop method of choosing a main jet (along with seat of the pants "feel") described below.
Tuning
Some aftermarket exhausts flow more then others. Some are "straight through" mufflers (i.e. you can see right through them) and others are packed (can't see through them). Try installing the 120 main jet and 27.5 pilot as your "solid" baseline with the stock needle clip position. These jets will work most of the time but some bikes may like the 117.5. In some cases, the 125 main jet will work but may be too rich in most cases. The 125 main jet may feel great at full throttle but could be too rich at anything under full throttle. Now is a good time to splice in the fuel filter and replace the intake rubber if you bought it. Install the slide, screw in the slide cap, and make sure that the top linkage adjustment on the slide cap is allowing full throttle by looking into the back of the carb while holding the throttle open at the handle bar. Make sure all the clamps are tight and the carb is in the proper position. Turn on the gas and make sure there are no fuel leaks at the fuel line attachments.
Initial setting: It is probably a good idea to turn the idle mixture screw all the way in and back it out 2 full turns to start. Put in a fresh sparkplug and start it up. Once good and warm, it is a good idea to set the idle speed and air-pilot mixture. Turn the idle screw in to for a faster than normal idle speed.
Note: turning the mixture screw in richens the mixture and turning it out leans it out.
Turn in the air mixture screw in until the engine's RPMs drop and it wants to stall. Now turn the air mixture screw out slowly in 1/8-turn increments until the RPMs rise. You'll get to a point when the RPMs will not raise any further (about 2-3 turns out). It is at this exact point that you'll turn the mixture screw in about 1/8th of a turn. Set idle speed back to normal.
First ride: Your first ride will be looking for drivability problems and getting a general idea of whether the mixture is lean or rich at idle, partial throttle, cruise, and full throttle. Here are some helpful hints.
A lean running bike (like the stock bullet) runs poorly when cold, needs lots of "choke", coughs and spits until it is warm and then runs well. Basically, a lean condition will improve as it gets warm. The exact opposite is true for a rich running engine since they will start well (usually without choke) and run great when cold. After the bike is run for 15 minutes or so, a rich running bike may not run as well in cruise mode but may actually run better at full throttle. A well-tuned Bullet will need minimal choke to start, and run pretty good when cold AND great when warm. There is no coughing, backfires or protest when opening the throttle! Take the bike out and if there are no major drivability issues, go for a 15-minute ride. Is the bike keeping a solid idle at when stopped? If it is erratic, check for air leaks at the intake side (you did replace the intake rubber right?). Does full throttle create a bog or does it pull strongly to the upper RPM? How does the part throttle cruise feel, steady or erratic? Read on.
The plug chop: The sparkplug will not lie to you. This technique will allow you to see a snapshot of the mixture at various RPMs. The procedure calls for running the bike for 15-20 minutes to get it up to full operating temperature and killing the engine at the RPM range you want to check (i.e. full throttle, cruise RPM, partial throttle, etc). Make sure you are on a road with no traffic and don't forget to pull in the clutch at the time you hit the engine kill switch. Pull off to the side of the road and remove the sparkplug. Look at the very tip of electrode. It should be ash colored to light brown/tan in color. Look at the insulator color. This part of the plug is white when new but should turn an off white or perhaps take on a light desert sand color. If the insulator is glossy white or blistered and the electrode tip white, this indicates a very lean condition. If the plug's insulator and electrode are black and sooty, this indicates a rich condition. If the mixture is correct and the sparkplug new, it may take up to 20-30 minutes of running to "season" the sparkplug -- otherwise you may mistakenly read the plug as lean.
Main Jet in detail: If you fitted the 120 main jet, refer to your plug inspections at full throttle and use the seat of your pants and ears to get a feel what full throttle performance is like. Don't be concerned with your partial throttle issues (if any) at this time. If the plug inspection is sooty and black, replace the main jet with a 117.5. If you suspect that the 120 is lean, try the 125. My bet is that the 120 main jet should be on the clean edge of the "green zone". Don't succumb to the temptation to run a richer jet higher then necessary. The top end performance may be fantastic but the carbon developing inside your engine will cause problems later on. It is probably better to error on the lean side of the "green zone" rather then the rich side for a clean burning engine! In any case, we will be jetted with an air/fuel mixture richer then stock while improving drivability and maintaining a clean running engine.
Needle position: You have the proper main jet selected and feel confident that the mixture is close to perfect at full throttle. You may be lucky and your partial throttle cruise is clean and crisp. Perform a plug chop at partial throttle as a double check; you may be too lean at cruise. If this is the case, try lowering the needle clip one position to richen up the mixture as a test. If the partial throttle plug chop shows a black and sooty plug, lower the needle by raising the clip one notch. Believe it or not, one clip position makes a huge difference in the mixture so take your time and go easy as experimentation is the name of the game.
Pilot jet: There is a lot of overlap between jets of similar sizes since you have the ability to set the idle mixture. The rule of thumb is this: If the sweet spot (described under initial setting) is 4 turns out or greater, go down one size on the pilot jet since you can lose the idle mixture screw through vibration. The 27.5 and 30 pilot jets will both do the job but having both will allow a greater degree of tuning and experimentation. Find the pilot jet that will “tune-in” between 2 and 3 turns.
There you have it. Hope this helps a few Bullet owners save a bit of time and frustration and get on the road that much sooner.
by James Lonano
(NOTE - YOU MAY USE THIS INFORMATION AS INSIGHT INTO WHAT OTHERS HAVE DONE TO MODIFY THEIR BULLET. IT IS NOT A RECOMMENDATION NOR AN OEM APPROVED SERVICE PROCEDURE. THE BULLET BLOG CANNOT WARRANT THE PROCEDURE OUTLINED BELOW AS 100% CORRECT FOR YOUR PARTICULAR BULLET. IF YOU FOLLOW THIS PROCEDURE YOU ARE DOING SO AT YOUR OWN RISK. IT IS FOR ILLUSTRATIVE PURPOSES ONLY.)


Cleaning your Royal Enfield
An exhaustive article about cleaning and maintaining your royal enfield !!


EFI Made Easy
Everything you need to know to take care of the system on your new EFI Royal Enfield in one short article.
Nice Article...........quite informative.
Where can I buy the Original 50's style muffler for my bull?....can somebody help please
Posted on 4:19:00 PM
The original is available in the market. Last month i got one
Posted on 5:49:00 PM
really nice article abt RE. Thanks a ton for such a wonderful article
Posted on 12:25:00 AM
Post a Comment